All-Pro Extreme Rock Guards (2000) ...
It took a few extra weeks but my new All-Pro Rock Sliders are finally installed! This has turned out to be the most expensive and frustrating automotive project in years. This is in NO WAY due to All-Pro or their rock guards!!! While cutting a "fish mouth" in one of the legs my hand slipped and sliced a tendon. If you're looking for attention I don't recommend this method!!! Eight to twelve weeks in brace that almost completely immobilizes your hand is NOT FUN! Guess I should be happy as I won't loose mobility or anything.
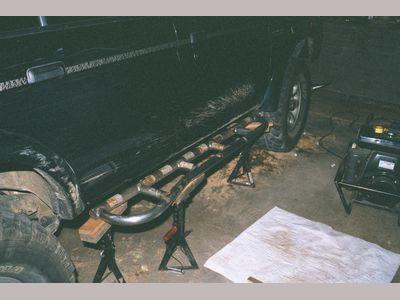
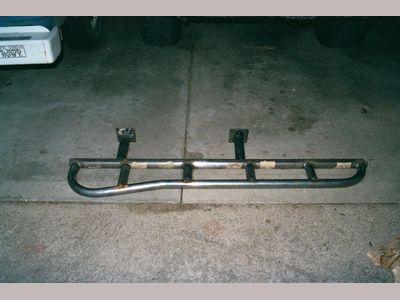
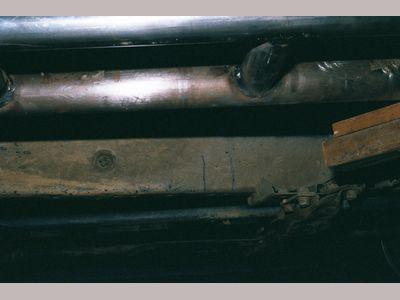
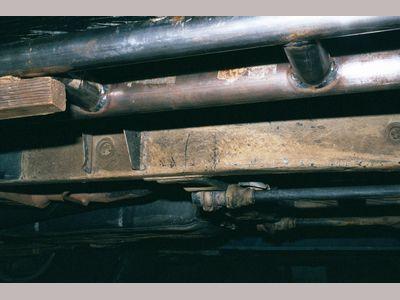
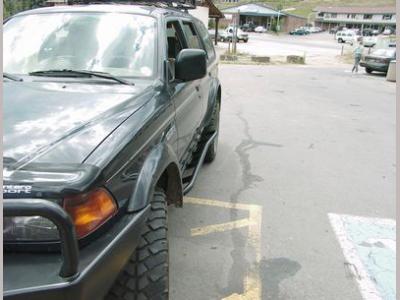
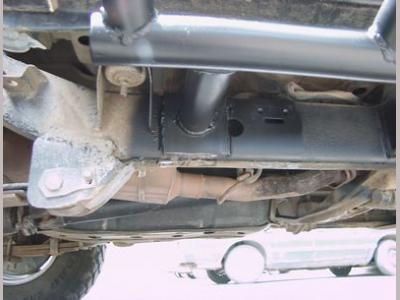
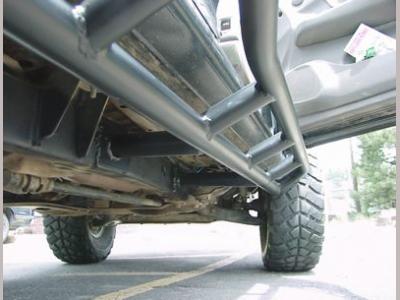
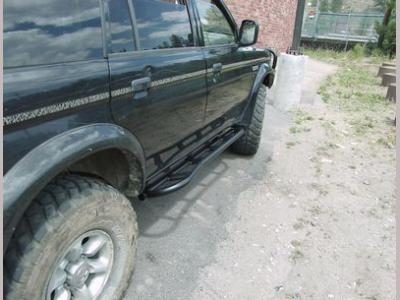
All-Pro Off Road supplied the rock guards, material for the legs, backing plates and gussets. Since these are intended for Toyotas I had All-Pro send the bars unassembled and unpainted - without the legs fabricated and welded on - so I could cut, fit and weld the bars to my Sport. All-Pro makes two different models, the standard set and an "extreme" set with "kick-outs" towards the rear of the bars. Having already noticed that 99% of my dings are occurring in the area of the rear doors I thought it wise to opt for the "extreme" set. All-Pro makes these in three lengths; after a few measurements I ordered the shortest set - 60" end to end. This set leaves a gap of about 5.5 inches between the edge of the fender well and the end of the bar. I know some will consider this an unacceptably large gap but I've never had a problem with this much gap before so I'm not overly concerned. Guess it depends on what the terrain you 'wheel on is like.
Here is a quote from All-Pro's web site giving a more technical description ...
We now have our All-Pro Rock Guards for all Toyota trucks and 4-Runners. Our guards are made from heavy duty 2" x .120" wall tubing for the rocker panel protector and 1 3-4" x .120" for the outer tube. The outer tube angles up at 25' to provide more ground clearance and more door protection.
Since I was obviously in no condition to install anything after my little accident, I took the bars, legs, other assorted pieces to a local 4x4 shop here in south Denver. High Country Performance 4x4. This is the same shop that installed the ARB carrier in the 3rd member and supplied the Rancho RS9000 shocks for my Sport. Having seen quite a bit of their fabrication work on other vehicles I felt comfortable taking my Sport there. Took one day and I got my Sport back with a nice freshly painted set of rock guards installed! Total cost was about $385 for the installation. Cost of the bars from All-Pro was $450 so total cost has come up to about $850. Told you this got expensive. If you do the install yourself it should be about $285 less.
Since there are a lot of people that don't know what a "rock guard", also known a "rock skid" or "rock slider", is and an equal number that just assume they're just really expensive "nerf bars" let me explain a couple things. Nerf bars and rock guards or rock sliders are designed for two different purposes. A nerf bar is really just a tubular running board; nothing more then a side step and about as durable. Most nerf bars are attached to the vehicle at each end of the bar utilizing a body mount bolt or existing holes in the chassis or body and supplied hardware; some have a thin strap that attaches the center of the nerf bar to the body to prevent sagging of the nerf bar over time. They are generally a single large diameter - 3" to 5" - thin walled steel or aluminum [ shaped tube. Usually cost about $200-300 for a nice set and sometimes that even includes installation. Nerf bars are almost always installable in your driveway with basic hand tools in an hour or two, tops.
Rock skids or rock guards are typically made out of smaller diameter 1.5" to 2.5" inch tube or 1" to 2" thick by 3" to 5" wide boxed steel with a wall thickness of at least .120". In the case of vehicles with frames the legs - two but most likely three or more - are usually welded directly to the chassis or to reinforcement plates that are then welded to the chassis for increased load distribution. For unibody vehicles guards or skids are bolted or screwed to the body itself every six to twelve inches. Properly designed and mounted guards or skids should support the weight of the vehicle and often are used as jacking points. Rock skids or rock guards will almost certainly be beyond the capabilities of most people to install at home do to the fabrication skills and equipment required. i.e. heavy grinders, arc welders, cut-off saws, etc.
Rock guards or skids should be capable of allowing you to place the guard or skid (supporting the weight of the vehicle) on a rock and pivot the vehicle or slide (on the rock) from one end of the bar or skid to the other without damage to the vehicle or major damage to the bar or skid. As well, it should protect the rocker panel area from damage by rocks and debris. The most significant difference between nerf bars and rock guards or skids is that nerf bars are not designed to support weight from underneath. Nerf bars are steps and as a step it is designed to support weight from the top. Rock guards or rock skids are intended to support weight and provide protection from underneath. Most nerf bars when hit from underneath simply fold up into the body the owner expects them to protect; occasionally doing more damage then had there been no nerf bars present at all.
Now, in several of the pictures you can see undercarriage damage. What DOES NOT show, however, is the damage to my rocker panels. The body pieces that run under the doors from fender to fender. Thankfully, none of the damage is serious - that means my doors still open! - but repairs would still cost several hundred dollars - AT LEAST as much as the cost of a set of All-Pro's rock guards. Ironically, one of the dents in the passenger side rocker panel was caused on Pearl Pass in Colorado by a factory nerf bar. While the factory Montero Sport bars are better then some I've seen, when the weight of the vehicle came to rest on the nerf bar the bar collapsed and bent in an upside down V shape and the point was forced up into the rocker panel. Hopefully this explains why it seems I spent so much on "rock guards" when I could have bought a set of "nerf bars" for MUCH, MUCH less.
Requirements ...
- Metric 3/8" socket set
- All-Pro Off Road Rock Sliders or Extreme Rock Sliders. Unpainted and without the legs pre-cut and attached
- The leg material, backing plates and gussets from All-Pro
- Arc or MIG/TIG welder
- Metal cut-off saw
- Bimetal hole saw and large 1/2" drill press OR actual tool for doing "fish mouth" cuts (recommended) - available from Summit Racing
- Grinder / flapper wheel for removing the undercoating and crud from the chassis
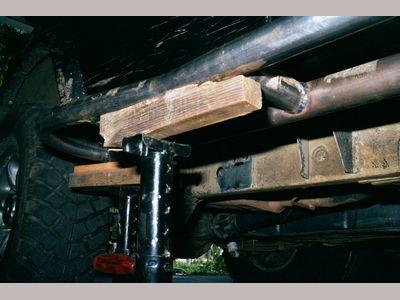
- At least two sets of jack stands tall enough to support the rock guards in the position and location they will ultimately be mounted in
- A dozen 8" long, 4" wide and 1" thick boards come in handy, too
- Associated marking and measuring tools, including an angle finder
- A couple cans of good rust prohibitive spray primer and paint
- A can of good undercoating
- A helper. Unless you've done this before, this really is a two person job
- Flat garage floor
Installation ...
That's all there is to it! Let the paint and undercoating dry well (several days) before you run the vehicle through the local hi-pressure car wash.
Review ...
October, 2011 Its been a bit over 10 years; long past time for a review. Overall opinion of the All-Pro Extreme rock skids? Awsome! I am throughly happy with the skids. They've been through hell on some of the worst trails in Colorado and Moab, Utah and have far exceeded my expectations.
The '97 Montero Sport these were mounted on weighs in at 5500 lbs. GVW unloaded and upwards of 6500 lbs. loaded. I've sat the vehicle down hard on these bars many times over the years with only very minimal scoring of the metal. No bends or dings and no evidence at all of tubing crush.
The kick-outs are wicked! They take a bit of practice to use effectivly but eventually they can become your best friend on narrow, twisty trails. I've gotten very good at using the kick-out to 'bump' the back end around turns. This can decrease your turning radius and protect the rear tire, rim and rear quarter pannel. If you're making a tight left hand turn and there is crud sticking out from the left is to use a light impact on the left kick-out to bump the back end to the right and away from trees or big rocks on the left. Kind of a poor man's rear stear.
I only have a few sugestions after running these for years. Make sure you paint them well. Use a good, durrable rust inhibitive paint that's easy to touch up. I don't recommend powder coating. Powder coating doesn't allow the bars to slide as well on some surfaces.
Get a roll of non-slip tape for the top of the bars so you have something to step onto besides bare metal. Sliping and falling out of a vehicle that sits 25+ inches off the ground sucks. Bare metal gets really slipery when wet and downright dangerous when icy.
All-Pro Off Road is now offering what they call Rock Slider Fill Plates. I like the idea from the perspective of making it safer to get in and out of lifted vehicles and protecting the door and rocker paint from splash. It is going to make it harder to clean mud and crud out of the bars, though. This is probably a small price to pay for preventing a broken ankle. Just as side note, the plates may be ordered seperately but will not fit the older Extreme bars.
